How to Shoot Water Drops with StopShot
Water Drop Photography
This page provides a step by step guide to taking pictures of water drops. We start with the big picture and move on to the specific settings for StopShot, the camera and flashes. All of this information is also applicable for the StopShot Studio controller. If you have no high speed photography experience there is a bit of a learning curve to capture good drop photos but all of the information you need is right here.
Water drop photography also called splash art or splash photography combines a lot of different elements but timing and lighting are the two most difficult to master. StopShot makes the timing easy and good lighting is the result of lots of diffusion and a bit of practice. Some reading on the subject never hurt either. If you are looking for a good book on the subject, I highly recommend the book "Light: Science and Magic: An Introduction to Photographic Lighting". It is like one of our customers recently said:
" I've begun to play with my StopShot and droplet collisions are very easy to do! It's a marvelous machine!
I was thinking that making the collisions was the difficult thing, but I was wrong, making aesthetic collision with good lightning, that is the challenge! "
The Water Drop Photography Kit
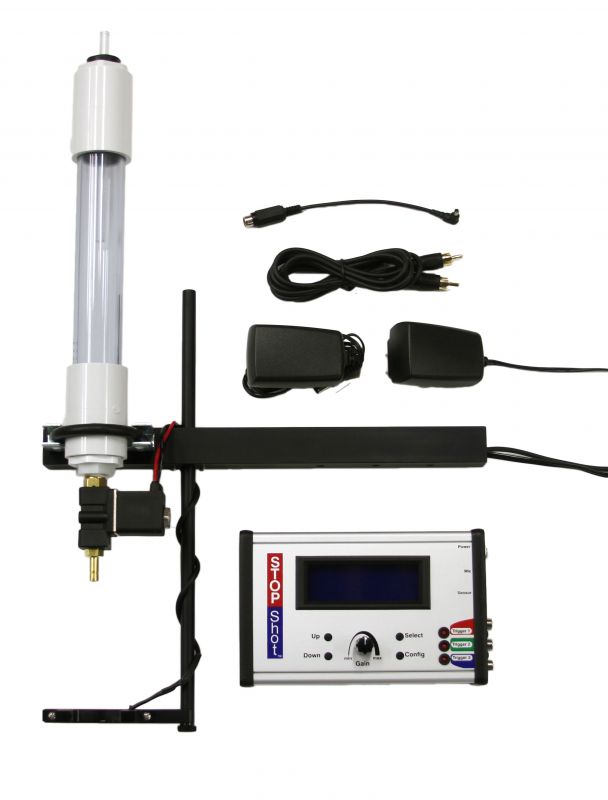
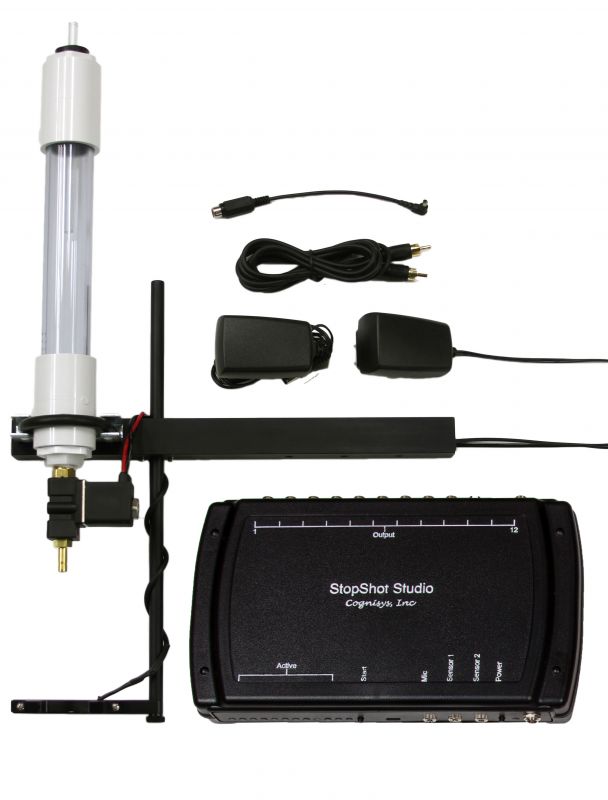
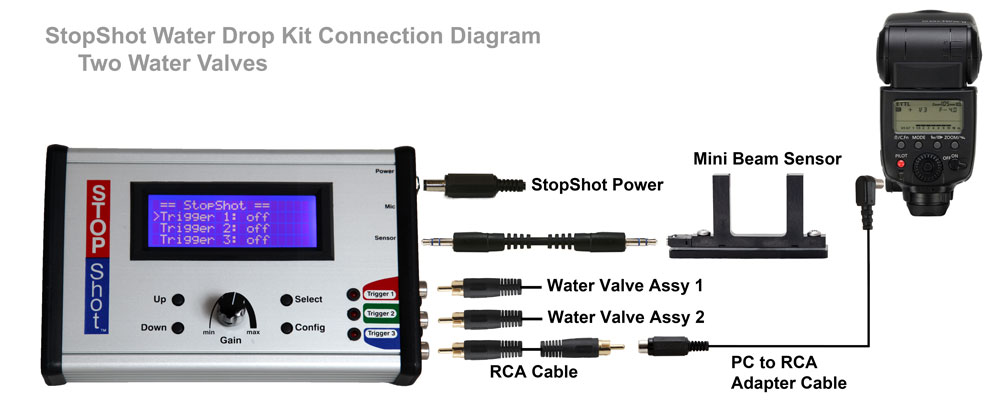
The Water Drop Photography Kit is the easiest way to get started with water drops. You will need a camera, a flash and an extra tripod to hold up the water drop kit, everything else to create a water drop photography setup is included. This does assume your flash has a pc sync connector on it, if it does not you will also need a Hot Shoe Adapter to get your flash connected to StopShot. The connection diagram is below.
The traditional way to take water drop photographs is to have your water drop setup in a darkened room, StopShot will control the water valves and flash and the camera will be controlled manually in bulb mode. If you have not taken drop shots before this is definitely the best way to start. The room does not need to be completely dark, I generally shoot drops with a 60W bulb underneath the table where I am set up. This leaves enough ambient light to see what you are doing but not affect the photographs. Using this method means there is no wiring between StopShot and the camera. Shooting this way greatly simplifies the configuration of StopShot.
Once you get comfortable with the timing involved photographing water drops it is possible to have StopShot completely automate the capturing process. To do this you will need a camera specific shutter cable. They can be found here.
The Big Picture for the Water Drop Kit
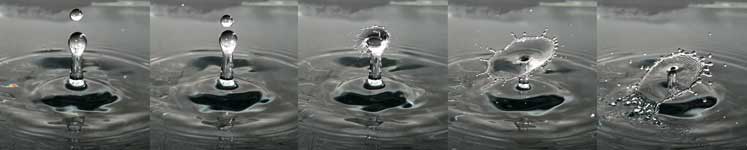
The image below shows the StopShot Water Drop Kit in action creating some splash art. Follow the numbers to get a feel for the process involved in capturing a water drop collision. See below for a walk through on configuring StopShot. The whole sequence takes just about 1 second.
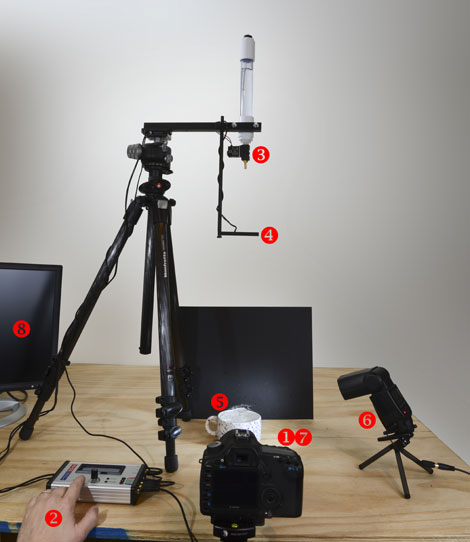
- 1. With the camera in Bulb mode press and hold the shutter button to open the shutter.
- 2. Press the UP or DOWN button to start the water drop sequence in StopShot.
- 3. Two water drops will be released by the valve with the timing you have programmed.
- 4. The Mini Beam Sensor will detect the first drop in free fall and start the Trigger 2 timer.
- 5. The water drop will hit the pool of water below, rebound and is struck with the second drop.
- 6. The time programmed into trigger 2 elapses and the flash fires to expose the image.
- 7. Release the shutter button on the camera to close the camera shutter.
- 8. Review your image. (Cable to connect camera to monitor not shown).
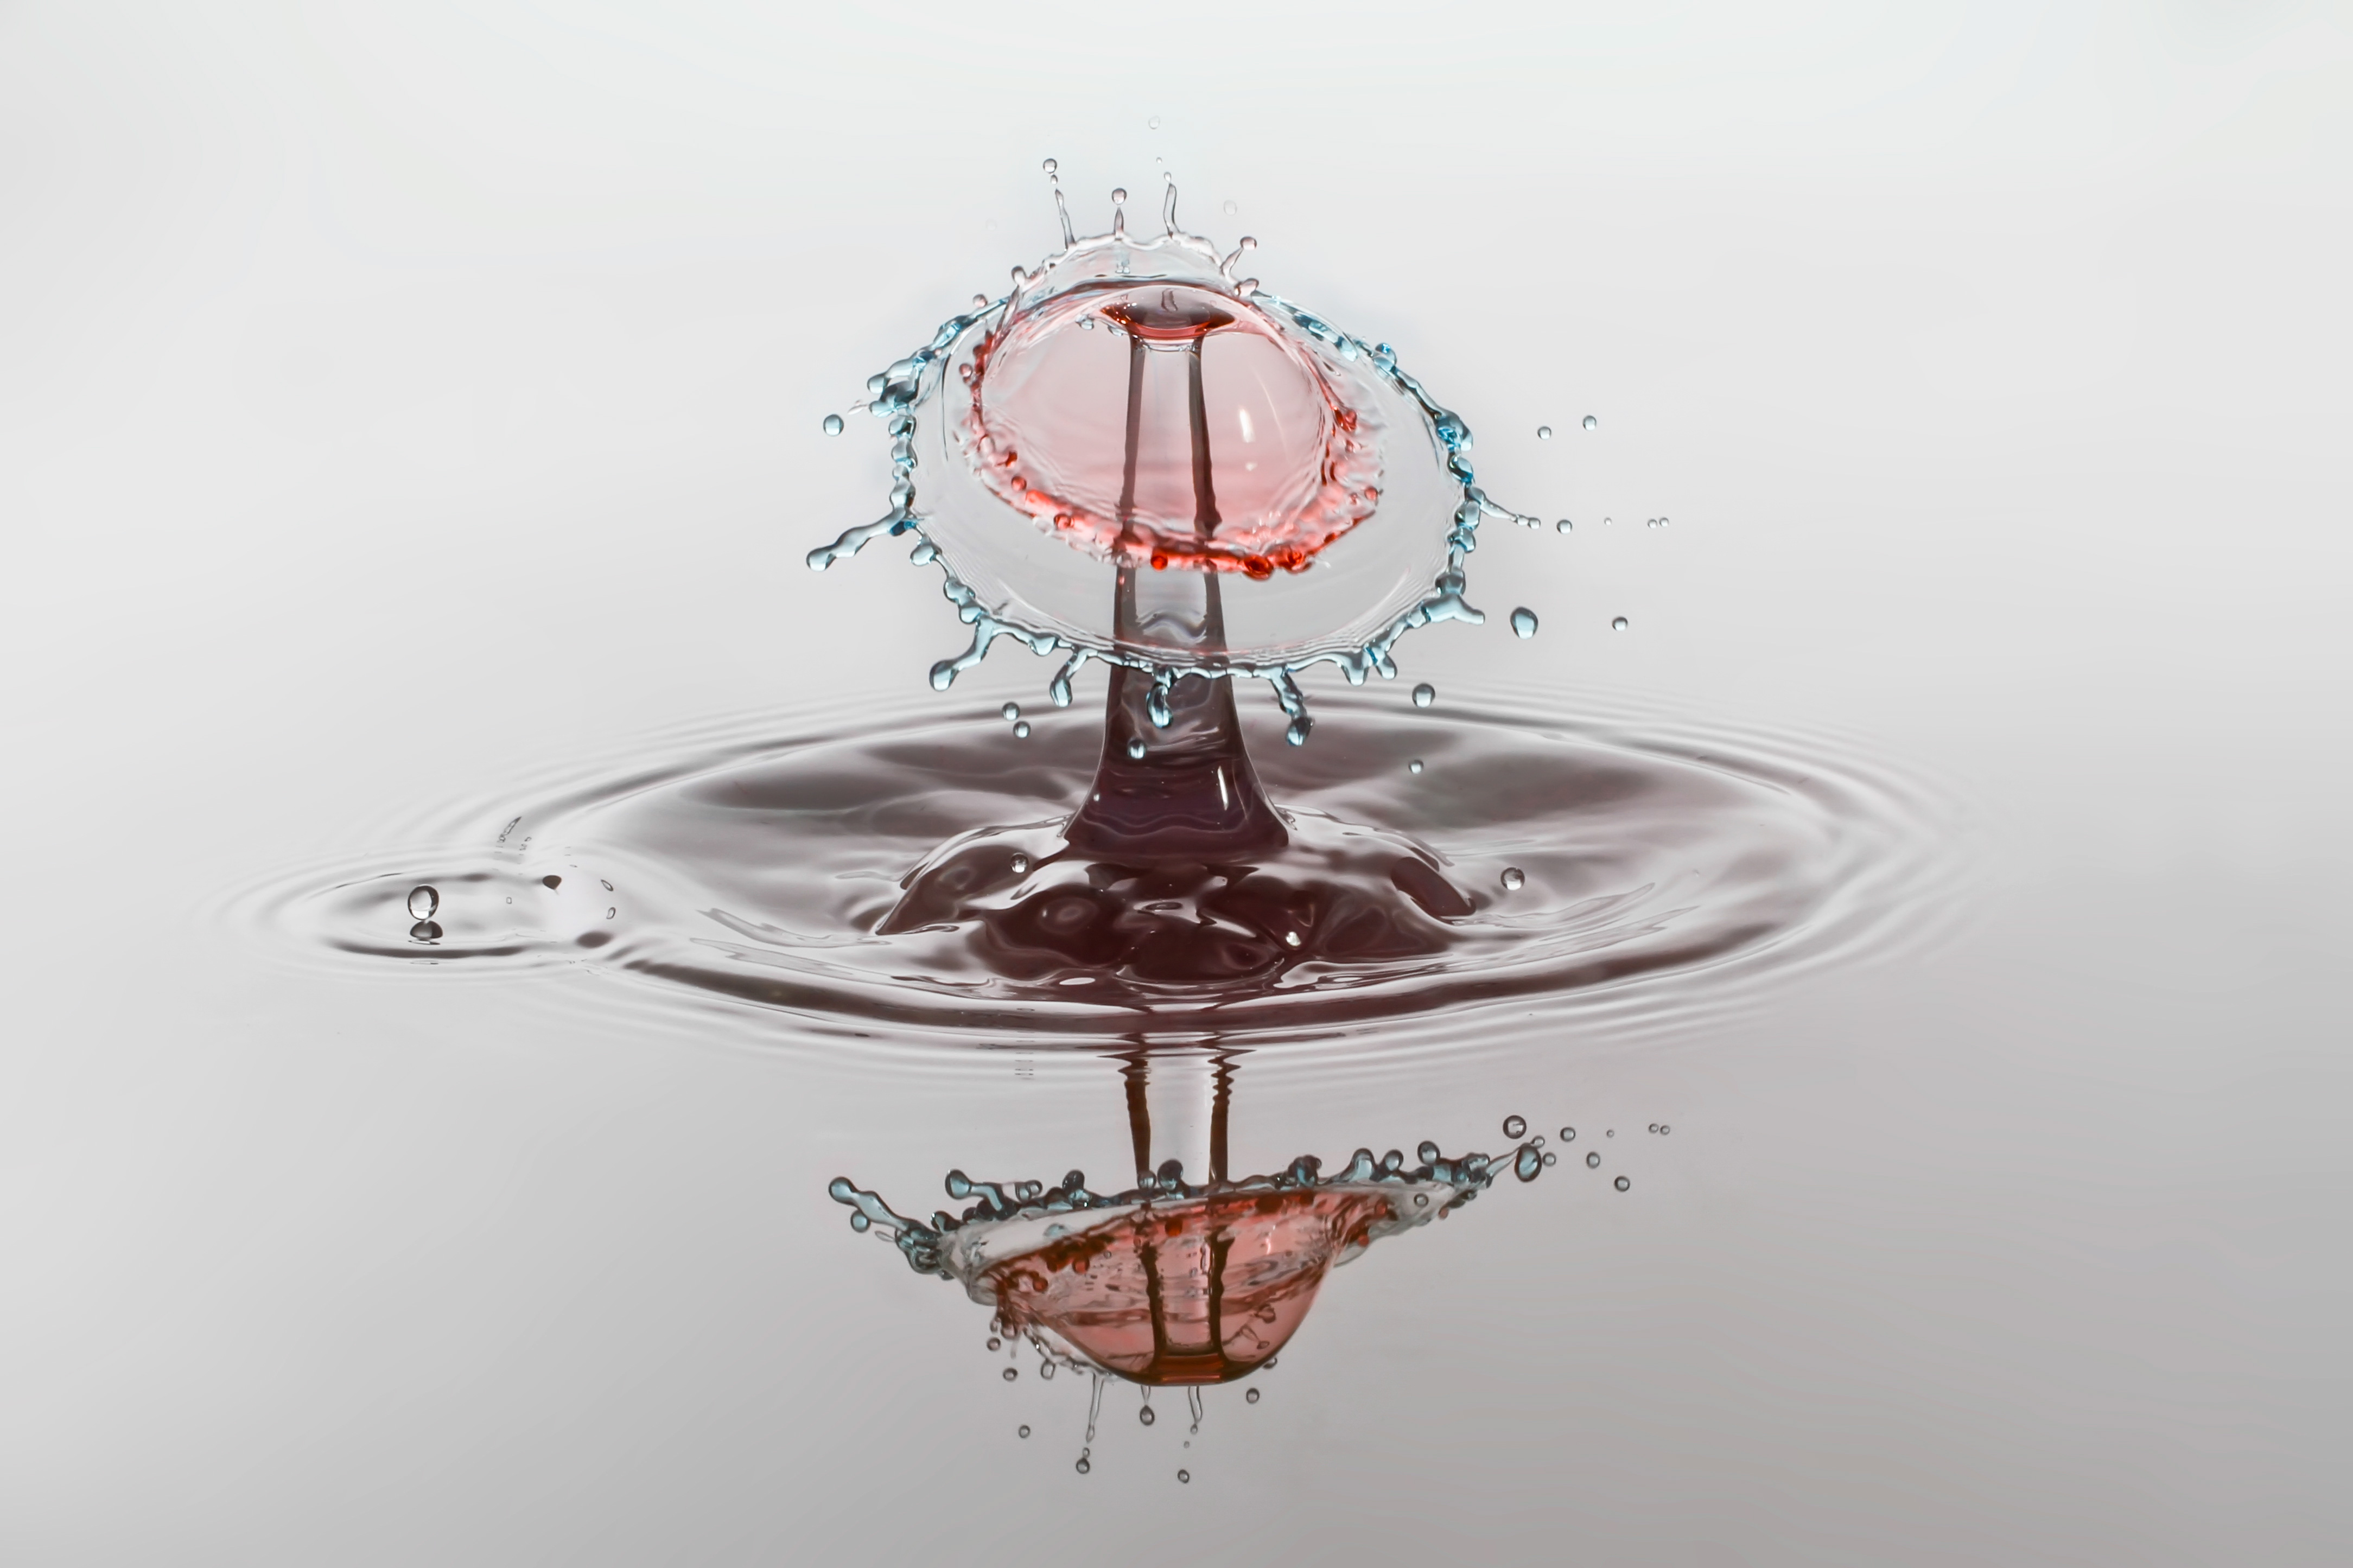
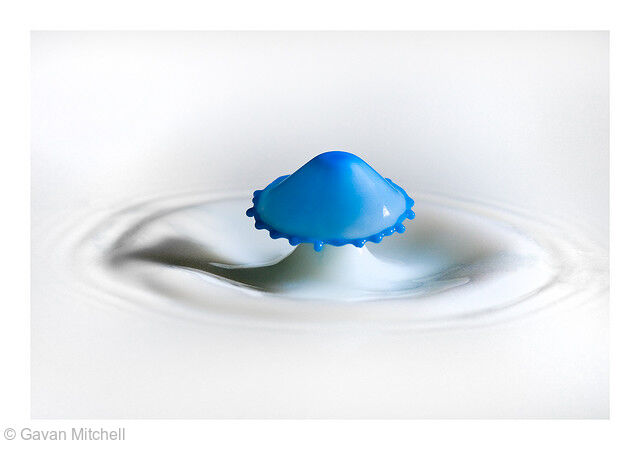
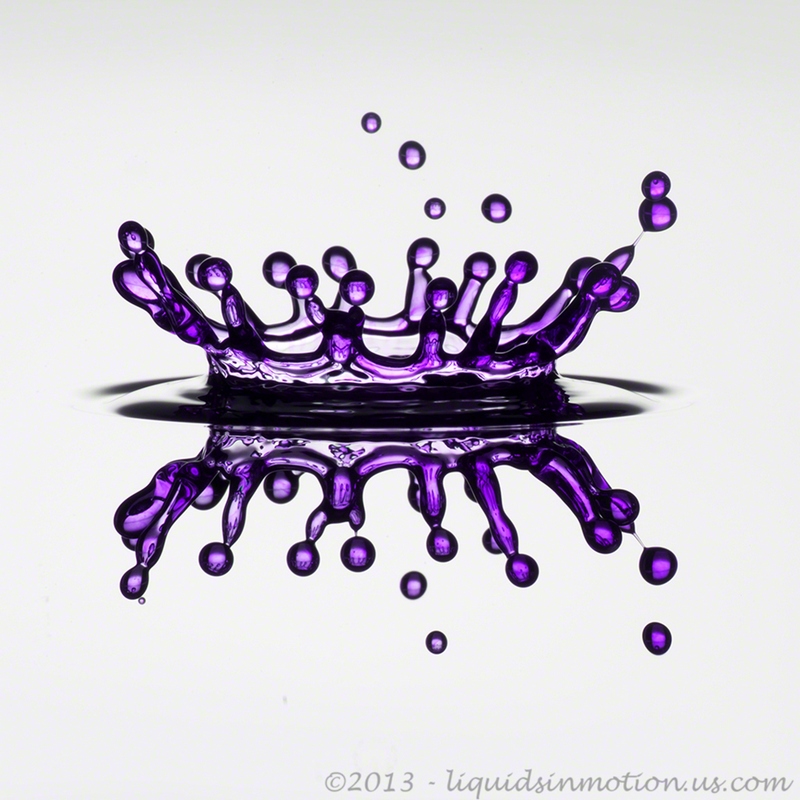
Splash Photography
Getting two drops to collide is usually a very difficult task. StopShot makes it easy. With StopShot and the Water Valve Assembly you can program StopShot to release multiple drops with a configurable amount of time between them. The result is a falling water drop colliding with the rebound of the first drop. This creates some spectacular photographic opportunities. It is possible to use StopShot to sync your camera, flash and the water drop but in the example setup below we assume traditional high speed photography methods. This means you will be shooting in a dimly lit room with the camera in bulb mode and being operated manually. The process for capturing a photo would be to press and hold the shutter button on your camera to open and hold open the camera shutter, then push the up button on StopShot to release the drops and after the flash is triggered release the shutter button. See the big picture section above for more details.
StopShot Setup for Water Drops
Below are the settings for StopShot to create a water drop collision. A drop collision only lasts for around 15 thousandths of a second (milliseconds or mS), so your timing needs to be right on to capture it. The settings listed here will vary depending on the physical setup and water chemistry you have but these settings will give you a good point to start. Our owners manual includes all of the physical dimensions for this setup.
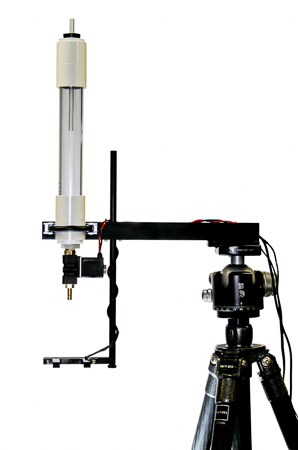
The first thing you need to do is get the water valve and IR sensor set up. See the image above for reference. Next StopShot is connected like the diagram shown to the right. All of the pieces you need accomplish this setup are included in the The Water Drop Photography Kit.
After you have the physical setup complete it is time to configure StopShot. First we need to change the global mode of StopShot from independent to sequential mode. Making this change will not allow the next triggers event to happen until the previous one is complete. Next, we need to set up each individual trigger to do what we want. Below are screen simulations of what StopShot should look like for the main screen and the trigger configurations for trigger 1. The owner's manual has more details about how to get to each setting if you need it.
|
== StopShot==
SEQ
|
||
|
>
|
Manual 1: | Waiting |
| Trigger 2: | 290 ms | |
|
|
Trigger 3: | off |
Trigger 1 Settings
|
>
|
T1 Mode:
|
Manual |
|
|
# Pulse: | 2 |
|
|
Pulse 1: | 15.0 ms |
|
|
Toff 1: | 80.0 ms |
When StopShot is in Manual mode it will only perform the programmed action when the up or down button is pressed. In this case when the button is pressed StopShot will activate the water valve for 15mS wait 80mS and then activate it again. This will give you two water drops 80mS apart (Toff).
The settings shown for Trigger 1 commands StopShot to wait for an event (water drop falling through the sensor) and then it will wait 290mS. Once the delay has expired it will assert the output that fires the flash.
This is only one method of taking these photos. There are many variations on this theme. Many people let their camera control the flash and just trigger the camera with StopShot. Due to the variable shutter lag and simplicity of setup I generally take the pictures in a dark room and control the camera manually in bulb mode. Experiment and use the method that works best for you.
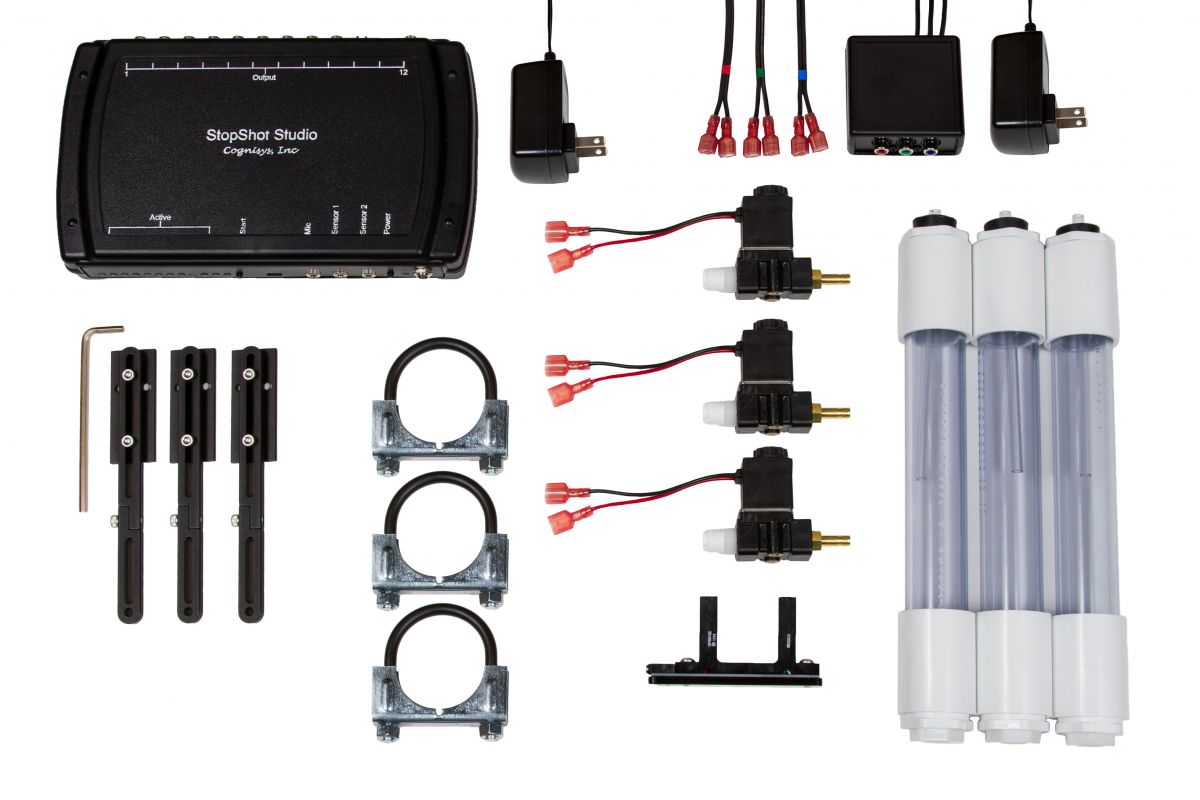
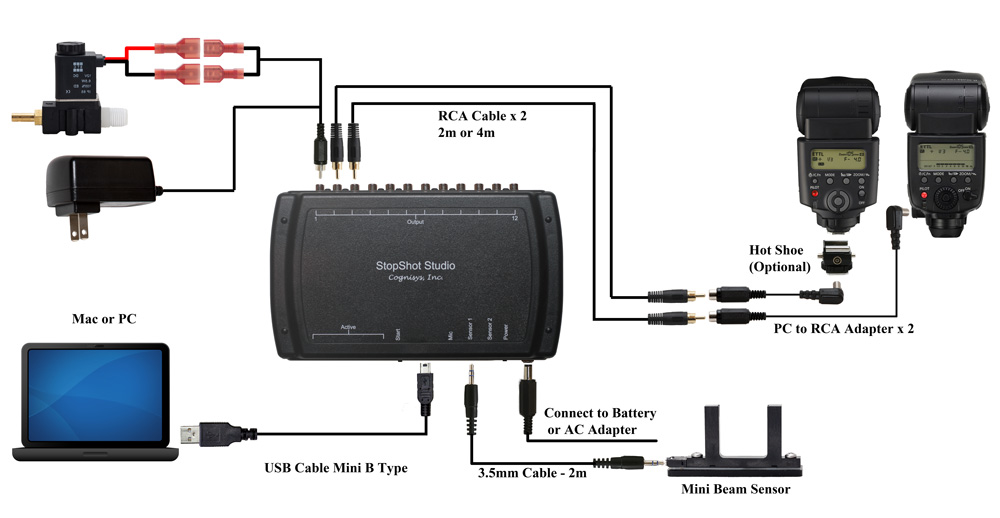
StopShot Studio Water Drop Kit Connection Diagram (with extra flash)
Auto Increment
StopShot can be set up to auto increment the trigger output time. Once you have a setup you are happy with you can have StopShot bump up the trigger time for each picture it takes. If your event is repeatable you can use this mode to capture several pictures of the event at incrementing values of time. An example of this is shown below.